
How To Wire A Keystone Jack

A keystone jack is a go-to for crafting Ethernet connections, versatile enough for home, business, and data center setups. Despite its initial complexity, mastering its termination is a breeze with a few handy steps and tricks. Let's dive in and get you connected in a snap.
If you already have all the tools you need then jump to the wiring steps that match your keystone jack:
Tools Needed
First let's get you set up with the right tools for wiring a keystone jack:
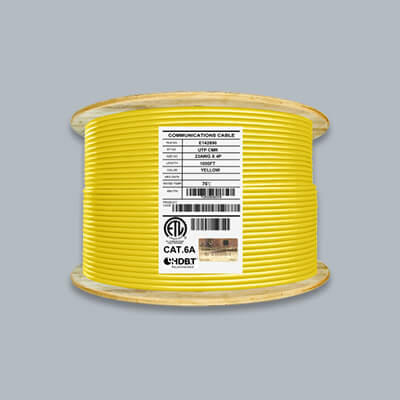
- Bulk Network Cable
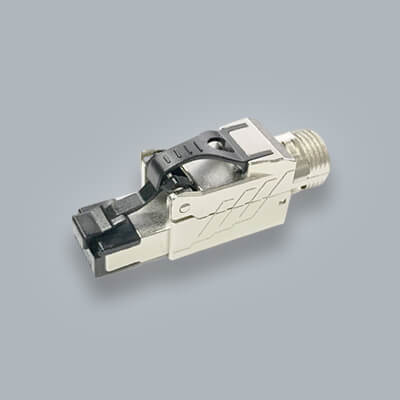
- Keystone Jack
- Jacket Stripper
- Wire Cutter
- Punch Down Tool
All of these tools are not required but they do make it a lot easier during wiring. The tool that we recommended you do have is a punch down tool. A punch down tool helps punch down the cables wires in to the contact area of the keystone jack. This ensures that proper contact is made. Not only does a punch down tool help punch down the wires but it also cuts off the wires on the side at the same time.
Got your tools? Shop for the best ethernet cable tools and also grab your keystone jacks.
How To Wire a 90° Keystone Jack
1. Strip 1 inch of jacket with jacket stripper


Using your cutting tool cut 1 inch off the jacket from the top of the cable. If you are using scissors or another cutting device make sure not to cut through the wires in the cable.
2. Cut the pulling string

If your cable comes with a pull string inside simply cut off the portion that is showing. The pull string is there to help strip the jack as well so if you need to take a little more jacket off you can use it.
3. Cut the spline

If your cable also has a spline / cross separator in the cable then cut off the portion that is showing. Try to cut off the most you can without damaging the wires.
4. Unwrap twisted pairs


Unwrap the twisted pairs so it's easier to insert on to the 90° keystone jack. The important part to this step is to decide which wiring scheme you want to go with. We recommend to go with t568b but you can use either a or b.
t568b goes in order:
- Orange stripe
- Orange
- Green Stripe
- Blue
- Blue stripe
- Green
- Brown stripe
- Brown
Using our 90° keystone jacks there will be wiring scheme guides on the side that you can follow along.
Before putting the wires on to the contact area you can also bunch up the Orange pair and green pair together, blue and brown pair together. This helps with laying the wires on the correct sides.
5. Jacket part stays outside of 90° keystone jack

Try not to insert the cables jacket too far in to the keystone jack. Try to get the jack just inside or touching the end of the jack. The other important thing to mention here is to not have any wiring exposed from the jack to the jack.
6. Put the wire in the groove

Using the wiring scheme you have chosen, lay down the wires in the grooves of the keystone jack.
7. Put keystone jack in the 90° punch down tool

If you are using a punch down tool you can now insert the jack in to the punch down area of the tool. Make sure the degree of the punch down tool matches the degree of the keystone jack. Insert with open side facing the grooves of the punch down tool.
8. Squeeze Punch down tool


By squeezing down on the punch down tool you should have wires now firmly inside the contact area of the jack. The wires hanging off the side should also have been cut off. If some weren't cut off that is ok. Simply cut off the remaining portion using a cutting device.
For this step make sure to double check the wires are deep enough in the contact area. If any of the wires are not in the contact area yet try using the tool again to punch them down.
9. Close the cap


After the wires are punched down you can now grab the cap to the keystone jack and cover the wires.
Congrats! You keystone jack is ready to go
How To Wire A 180° Keystone Jack
1. Strip 1 inch of jacket with jacket stripper
2. Cut the pulling string

If your cable comes with a pull string inside simply cut off the portion that is showing. The pull string is there to help strip the jack as well so if you need to take a little more jacket off you can use it.
3. Cut the spline
If your cable also has a spline / cross separator in the cable then cut off the portion that is showing. Try to cut off the most you can without damaging the wires.
4. Unwrap twisted pairs
Unwrap the twisted pairs so it's easier to insert on to the 180° keystone jack. The important part to this step is to decide which wiring scheme you want to go with. We recommend to go with t568b but you can use either a or b.
t568b goes in order:
- Orange stripe
- Orange
- Green Stripe
- Blue
- Blue stripe
- Green
- Brown stripe
- Brown
Using our 180° keystone jacks there will be wiring scheme guides on the side that you can follow along.
Before putting the wires on to the contact area you can also bunch up the Orange pair and green pair together, blue and brown pair together. This helps with laying the wires on the correct sides.
5. Jacket part stays outside of 180° keystone jack

The different with a 180° keystone jack is that you can actually position the cable in two ways. Going straight on to the jack or from the side like you would for a 90° jack. Try not to insert the cables jacket too far in to the keystone jack. Try to get the jack just inside or touching the end of the jack. The other important thing to mention here is to not have any wiring exposed from the jack to the jack.
6. Put the wire in the groove

Using the wiring scheme you have chosen, lay down the wires in the grooves of the keystone jack.
7. Put keystone jack in the 180° punch down tool

If you are using a punch down tool you can now insert the jack in to the punch down area of the tool. Make sure the degree of the punch down tool matches the degree of the keystone jack. Insert with open side facing the grooves of the punch down tool.
8. Squeeze Punch down tool


By squeezing down on the punch down tool you should have wires now firmly inside the contact area of the jack. The wires hanging off the side should also have been cut off. If some weren't cut off that is ok. Simply cut off the remaining portion using a cutting device.
For this step make sure to double check the wires are deep enough in the contact area. If any of the wires are not in the contact area yet try using the tool again to punch them down.
9. Close the cap

After the wires are punched down you can now grab the cap to the 180° keystone jack and cover the wires.
Congrats! Your keystone jack is ready to go