

How to Install an Ethernet Outlet

Installing an Ethernet outlet can provide a fast, stable wired connection in areas where WiFi may be weak, inconsistent, or congested. A properly installed wall outlet creates a clean connection point for a home office, gaming system, smart TV, wireless access point, security camera, or other network device.
The basic process involves routing solid conductor bulk Ethernet cable to the desired location, terminating it into a compatible keystone jack, installing the jack in a wall plate, and testing the completed connection. This guide explains each networking step while helping you choose the correct cable and components for a dependable installation.
Ethernet Outlet Installation at a Glance
- Choose the outlet location and plan the cable route.
- Select the correct Ethernet cable and matching keystone jack.
- Route the cable to the outlet location without damaging it.
- Terminate both ends using the same T568A or T568B wiring standard.
- Snap the keystone jack into the wall plate.
- Test the completed connection before connecting your device.
What Do You Need to Install an Ethernet Outlet?
A basic Ethernet outlet installation requires networking cable and connectivity components that match one another. Using the correct combination helps preserve the cable category rating and provides a more reliable connection.
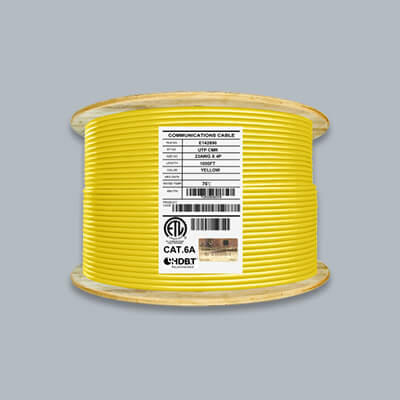
- Bulk Ethernet cable: Solid conductor cable is generally preferred for permanent runs through walls, ceilings, attics, and other building pathways.
- Keystone jack: The jack should match the category and shielding type of the cable whenever possible.
- Ethernet wall plate: A single port, dual port, or multiport wall plate can be selected based on the number of connections needed.
- Low voltage mounting bracket: The bracket supports the wall plate and helps it sit securely against the finished wall.
- Punch down tool: This seats the conductors into the insulation displacement contacts on a punch down keystone jack.
- Cable preparation tool: A suitable cable stripping tool helps remove the outer jacket without damaging the twisted pairs.
- Ethernet cable tester: A tester checks the wire map and helps identify crossed, open, reversed, or shorted conductors.
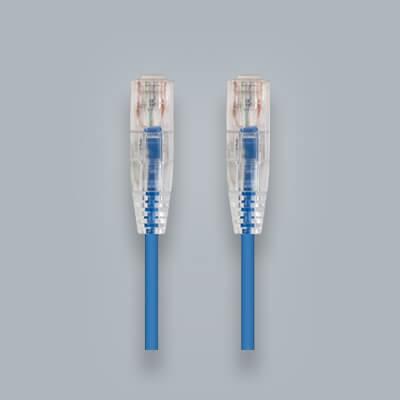
- Patch cables: Short patch cables connect the finished wall outlet to a computer, router, switch, or other network device.
You can find compatible termination and tools Ethernet cable tools collection.
1. Choose the Best Location for the Ethernet Outlet
Begin by identifying where a wired network connection will provide the most value. Common locations include behind a desk, near a television, beside a gaming setup, close to a wireless access point, or near equipment that benefits from a dedicated connection.
Consider the following when selecting the location:
- Device placement: Position the outlet close enough that a short patch cable can connect the device without stretching across the room.
- Network equipment: Plan how the permanent cable will connect back to the router, network switch, patch panel, or central wiring location.
- Cable route: Choose a route that avoids sharp bends, unnecessary length, heat sources, moisture, and areas where the cable could be damaged.
- Future use: Consider installing two or more ports when the room may eventually need additional computers, access points, televisions, cameras, or other network devices.
- Accessibility: Make sure the finished outlet will remain accessible after furniture and equipment are installed.
When the outlet will be installed behind a television or desk, leave enough room for the wall plate and connected patch cable without forcing the connector into a tight bend.
2. Choose the Right Ethernet Cable
The cable used inside the wall has a direct effect on the performance, installation compatibility, and long term reliability of the outlet. For most permanent residential and commercial runs, use solid conductor bulk cable rather than flexible stranded patch cable.
Cat5e Cable
Cat5e bulk cable remains suitable for many basic Gigabit Ethernet applications. It can be a practical option for an existing Cat5e network, but new installations commonly use Cat6 or Cat6A for additional performance headroom.
Cat6 Cable
Cat6 bulk cable is a popular choice for home offices, gaming rooms, streaming devices, security systems, wireless access points, and general business networks. It provides strong performance while remaining compatible with commonly available Cat6 keystone jacks and patch cables.
Cat6A Cable
Cat6A bulk cable is designed to support 10 Gigabit Ethernet over the full standard channel distance when the complete cabling system is installed correctly. It is typically thicker than Cat6 and should be paired with Cat6A rated jacks, patch panels, and patch cables.
| Cable Category | Common Use | Outlet Components |
|---|---|---|
| Cat5e | Basic Gigabit networks and existing Cat5e systems | Cat5e or higher rated compatible components |
| Cat6 | Homes, offices, gaming, streaming, cameras, and access points | Cat6 keystone jack and Cat6 patch cable |
| Cat6A | Higher bandwidth networks and full distance 10 Gigabit installations | Cat6A keystone jack and Cat6A patch cable |
Choose the Correct Jacket Rating
The cable jacket must be appropriate for the installation environment. Riser rated cable is commonly used for vertical runs and general in wall pathways where permitted. Plenum rated cable is intended for plenum air handling spaces where that rating is required. Outdoor or direct burial cable should be used when any part of the run will be exposed to sunlight, moisture, or underground conditions.
Always confirm local requirements and the rating needed for the specific pathway before selecting the cable.
Shielded or Unshielded?
Unshielded twisted pair cable is suitable for many home and office installations. Shielded cable may be considered in environments with elevated electromagnetic interference, but the entire shielded cabling system must be selected and installed correctly. This includes the cable, keystone jacks, patch panel, patch cables, and grounding or bonding requirements.
For an ordinary residential room without a known interference issue, an unshielded Cat6 system is often the simpler option.
3. Choose Compatible Keystone Jacks and Wall Plates
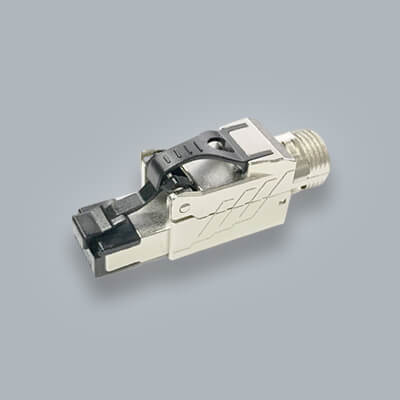
A keystone jack creates the female Ethernet port in the wall. It should be compatible with the cable category, conductor size, cable construction, and shielding type.
- Cat6 cable should normally be terminated with Cat6 keystone jacks.
- Cat6A cable should normally be terminated with Cat6A keystone jacks.
- Shielded cable should be paired with a compatible shielded jack and shielded system components.
- The jack should support the conductor gauge and outside cable diameter being installed.
Most modular jacks snap into standard Ethernet wall plates. Wall plates are available with one or more openings, allowing network, telephone, coaxial, audio, and other low voltage connections to share the same plate when appropriate. Choose a wall plate with enough ports to accommodate your current needs or allowing room for future expansion.
4. Prepare the Outlet Location
Prepare an appropriate wall opening and install the low voltage mounting bracket according to the bracket manufacturer's instructions. The bracket should sit securely and allow the finished wall plate to remain level and flush against the wall.
Before routing cable into the area, verify that the pathway is appropriate for low voltage cabling. Avoid placing the outlet where the cable or connector could be crushed, sharply bent, exposed to moisture, or blocked by permanent furniture.
Important: Do not assume a wall cavity is empty. Be aware of electrical wiring, plumbing, structural components, and other concealed systems. When the route or wall conditions are uncertain, have the location prepared by a qualified professional.
5. Route the Ethernet Cable
Route the bulk cable from the network equipment or central wiring location to the new outlet. Depending on the building, the pathway may travel through a wall cavity, attic, crawl space, basement, conduit, raceway, or another approved low voltage route.
- Leave service length: Leave enough extra cable at each end to terminate the jack comfortably and make future repairs if needed.
- Avoid sharp bends: Do not fold or kink the cable. Follow the cable manufacturer's minimum bend radius.
- Do not pull excessively: Excessive pulling force can stretch or damage the internal conductors and affect performance.
- Protect the jacket: Do not drag the cable across sharp surfaces or allow it to become crushed by fasteners.
- Keep distance from electrical wiring: Avoid long parallel runs next to power wiring. When a crossing is necessary, crossing at approximately a right angle can help reduce interference.
- Use proper support: Support the cable without compressing or deforming the jacket.
- Label both ends: Labeling becomes especially important when several cables are routed to one central location.
A permanent Ethernet link should generally use solid conductor cable for the horizontal run. Flexible stranded cable is better suited to shorter patch connections between the outlet and the device.
6. Understand T568A and T568B Wiring
Ethernet cable contains four twisted wire pairs. These conductors must be placed into the correct positions on the keystone jack using either the T568A or T568B wiring standard.
Both standards can support normal Ethernet connections. The most important requirement is consistency: use the same wiring standard at both ends of the permanent cable.
| Pin | T568A | T568B |
|---|---|---|
| 1 | White/Green | White/Orange |
| 2 | Green | Orange |
| 3 | White/Orange | White/Green |
| 4 | Blue | Blue |
| 5 | White/Blue | White/Blue |
| 6 | Orange | Green |
| 7 | White/Brown | White/Brown |
| 8 | Brown | Brown |
T568B is commonly found in many existing network installations, while T568A may be specified in other residential, government, or structured cabling systems. Before terminating a new outlet, check the standard already used at the patch panel, existing outlet, or opposite end of the cable.
For a more detailed termination walkthrough, read our guide on how to wire a keystone jack.
7. Terminate the Ethernet Cable Into the Keystone Jack
After the cable reaches the outlet, prepare and terminate it according to the instructions supplied with the keystone jack.
- Allow enough cable to work with. Avoid cutting the cable too short. A small amount of service length makes termination and future maintenance easier.
- Remove only the necessary outer jacket. Take care not to nick or scrape the insulation on the internal conductors.
- Separate the twisted pairs carefully. Keep each pair twisted as close to the termination point as possible.
- Select T568A or T568B. Follow the color code printed on the keystone jack and match the wiring method used at the opposite end.
- Place each conductor in its assigned slot. Make sure the solid colored and striped conductors are not reversed.
- Seat the conductors completely. Use the termination method specified by the jack manufacturer.
- Inspect the termination. Confirm that every conductor is fully seated and that no exposed copper extends beyond the connection point.
- Install the jack cover or retention cap. This helps hold the cable and conductors in place when included with the jack.
Protect the Twisted Pairs
Do not untwist more of each wire pair than necessary. The twists help control crosstalk and interference. Keeping the pair twist close to the jack is important for maintaining the expected cable performance.
8. Terminate the Other End of the Cable
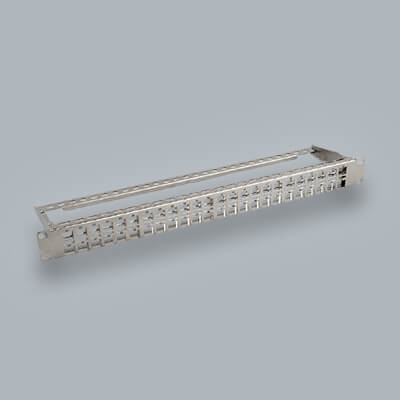
The opposite end of the permanent cable must also be terminated. Depending on the network layout, it may connect to another keystone jack or to a port on a network patch panel.
Router or Network Switch
↓
Patch Cable
↓
Patch Panel or Keystone Jack
↓
Permanent Bulk Ethernet Cable
↓
Ethernet Wall Outlet
↓
Patch Cable
↓
Computer, TV, Console, Camera, or Access Point
Use the same T568A or T568B standard on both ends. Using T568A at one end and T568B at the other creates a crossover configuration rather than a standard straight through permanent link.
Learn more about the difference in our patch cable vs crossover cable guide.
9. Install the Keystone Jack in the Wall Plate
Once the jack is terminated and inspected, snap it into the rear of the wall plate. Confirm that the Ethernet port faces the correct direction and that the retention tabs are fully engaged.
Position the cable behind the plate without forcing it into a tight bend. Then attach the wall plate to the low voltage mounting bracket so it sits level and flush against the wall.
For more detailed instructions, see how to attach a keystone jack to a wall plate.
10. Test the Ethernet Outlet
Testing should be completed before the installation is placed into regular service. A basic wire map tester can confirm that all eight conductors are connected in the correct order.
Connect the main and remote portions of the tester to opposite ends of the cable and review the results. A correct straight through connection should show pins 1 through 8 in the same order on both ends.
Common Cable Tester Results
- Open: One or more conductors are not making a complete connection.
- Short: Two or more conductors are touching when they should remain separate.
- Reversed: A pair or individual conductor is connected in the opposite order.
- Crossed: Conductors are connected to incorrect pin positions.
- Split pair: The pin order may appear correct, but conductors from different twisted pairs were combined incorrectly.
If the wire map passes, connect the outlet to the network using a properly rated patch cable. Plug a computer or other device into the new outlet and check for Ethernet link lights, network access, and the expected negotiated connection speed.
You can use Cat6 patch cables with a Cat6 installation. For a Cat6A system, use compatible Cat6A patch cables to preserve the intended category performance.
Common Ethernet Outlet Installation Mistakes
Using Different Wiring Standards on Each End
Using T568A on one end and T568B on the other changes the pin arrangement. Always confirm the color code at both termination points before completing the installation.
Untwisting the Wire Pairs Too Far
Excessive untwisting can increase crosstalk near the jack. Keep the pair twists intact until the conductors are close to their termination slots.
Using Stranded Patch Cable for the Permanent Run
Stranded cable is flexible and well suited to patch cords, but permanent in wall links commonly use solid conductor cable. Make sure the cable construction is compatible with the keystone jack.
Using Mismatched Components
A Cat6A cable terminated with lower category or incompatible components may not provide full Cat6A channel performance. Match the cable, jacks, patch panel, wall outlet, and patch cables whenever possible.
Damaging the Cable During Routing
Kinks, crushing, excessive pulling tension, sharp bends, and damaged jackets can affect the cable's electrical performance even when the individual conductors still show continuity.
Running the Cable Too Close to Electrical Wiring
Long parallel runs beside power wiring can increase the possibility of interference. Use an appropriate low voltage pathway and maintain separation where possible.
Skipping the Cable Test
An outlet may look correct while still containing an open, reversal, crossed pair, or split pair. Test every installed cable before connecting important network equipment.
Ethernet Outlet Troubleshooting
The Ethernet Outlet Has No Connection
Check both patch cables, confirm the network switch or router port is active, and verify the permanent cable with a cable tester. Inspect each keystone jack for a conductor that is loose or seated in the wrong slot.
The Link Light Does Not Turn On
Try a known working patch cable and another switch port. Confirm that the device's Ethernet adapter is enabled. If the link light remains off, retest the permanent cable and inspect both terminations.
The Outlet Connects at a Slower Speed Than Expected
A damaged conductor, split pair, poor termination, lower category component, or incompatible patch cable can reduce the negotiated speed. Verify that all four pairs are terminated correctly and that every component supports the desired network speed.
The Connection Works Intermittently
Intermittent service can be caused by a conductor that is not fully seated, a damaged patch cable, excessive cable movement, a loose keystone jack, or physical damage along the permanent run.
The Tester Shows the Wrong Wire Order
Compare both ends with the T568A or T568B color code. Reposition and terminate any conductor connected to the wrong slot, then test the cable again.
For a wider troubleshooting checklist, see our guide on what to do when an Ethernet cable is not working.
Frequently Asked Questions
Should I Use Cat6 or Cat6A for an Ethernet Outlet?
Cat6 is a strong choice for many residential and small business installations. Cat6A may be preferred when full distance 10 Gigabit Ethernet, additional performance headroom, or a higher category structured cabling system is required.
Can I Use a Regular Ethernet Patch Cable Inside the Wall?
Permanent in wall runs commonly use solid conductor bulk Ethernet cable with the correct building jacket rating. Flexible stranded patch cable is generally intended for shorter device and equipment connections.
Does the Keystone Jack Need to Match the Cable?
Yes. The jack should support the cable category, conductor gauge, shielding type, and cable construction. Matching components helps preserve performance and simplifies installation.
Should I Use T568A or T568B?
Either standard can support a normal Ethernet connection. Use the standard already present in the network or the standard specified for the project. Both ends of the same cable must match.
Can I Install Two Ethernet Ports in One Wall Plate?
Yes. A dual port or multiport wall plate can hold multiple keystone jacks. Each Ethernet port requires its own complete four pair cable run.
Can One Ethernet Cable Feed Two Wall Outlets?
A standard Ethernet connection should use all four twisted pairs. For normal modern networking, route a separate cable to each outlet rather than dividing one cable between two ports.
How Far Can an Ethernet Outlet Be From the Network Switch?
A standards based Ethernet channel is generally limited to 100 meters, or 328 feet, including the permanent cable and patch cords. The permanent link portion is typically shorter to allow for patch cables at both ends.
Can Ethernet Cable Run Next to Electrical Wiring?
Avoid long parallel runs next to electrical wiring whenever possible. Use an appropriate low voltage pathway and follow applicable separation and building requirements.
Do I Need a Patch Panel?
A patch panel is not always required for a single outlet, but it provides a clean and organized termination point when several cables return to one network location.
Can I Install an Ethernet Outlet Behind a TV?
Yes. An outlet behind a television can provide a stable wired connection for streaming. Leave enough clearance for the wall plate and patch cable so the connector is not sharply bent or crushed.
Can I Use an Ethernet Outlet for a Wireless Access Point?
Yes. Ethernet outlets are commonly used to connect wireless access points. When Power over Ethernet is being used, make sure the cable, connectors, switch, and access point are compatible with the required PoE application.
Why Does My Tester Pass but the Network Still Does Not Work?
A basic continuity tester may confirm pin order without measuring the full performance of the cable. Also check the patch cables, device settings, router or switch port, link lights, cable category, and quality of each termination.
Shop Ethernet Outlet Installation Components
A reliable Ethernet outlet depends on compatible cable and connectivity from one end of the channel to the other. Infinity Cable Products carries the components needed for residential, commercial, and structured cabling installations.
- Shop bulk Ethernet cable
- Shop Cat6 bulk cable
- Shop Cat6A bulk cable
- Shop Ethernet keystone jacks
- Shop Ethernet wall plates
- Shop patch panels
- Shop Cat6 patch cables
- Shop Ethernet cable tools
Conclusion
Installing an Ethernet outlet creates a clean and dependable wired connection for computers, televisions, game consoles, access points, cameras, and other network devices. The quality of the finished connection depends on more than simply placing a port in the wall. The cable, keystone jack, wall plate, patch cables, wiring standard, and terminations must all work together.
Choose the correct cable for the environment, match the cable with compatible components, maintain the twisted pairs during termination, use the same wiring standard at both ends, and test the completed link before connecting your equipment. These steps help create an Ethernet outlet that provides reliable network performance for years to come.
